
In the article of today, I’m gonna explain how to deploy a Spring Boot application in AWS Lambda.
Some weeks ago, I was asked to create a complete backend infrastructure using Java. The first thoughts were to create an AWS ECS cluster. But I had to pay the infrastructure by myself, and ask for a refund later.
I don’t want to pay 300€ per month to have a ECS Cluster running for a project. So, I’ve decided to use AWS Lambda.
But AWS Lambda is configured to map a request to a single entry point, to a single method. AWS Lambda is used to perform a single action when invoked.
But in my case, I want to deploy a complete web application into a serverless platform. The difference is that I want to create several endpoints in my Spring Boot application. And I want to map them all to a single URL.
To do so, I need to use a proxy with an API Gateway.
You can find the complete project used in the article in the following Github repository.
And if you want a more detailed version, check the following video.
Spring Boot Project
My Spring Boot project needs a handleRequest method to connect to AWS Lambda. But I also want to create several endpoints.
To satisfy both requirements, my Spring Boot application needs to follow a given structure to be adapted to AWS Lambda. For that, I need to create my project using a Maven archetype.
A Maven archetype is a template project, which already has the needed dependencies, structure and methods for a given goal. In my case, the goal is to deploy in a serverless platform.
Hopefully, I have an archetype created by AWS to deploy a Spring Boot project.
This also means that today, I won’t use Spring Initializer to create my project. I will create the project directly from IntelliJ.
To find the adequate archetype, I must choose the Maven Central Catalog, where are listed all the available archetypes.
Once filled the rest of the options, I can hit on the Create button.
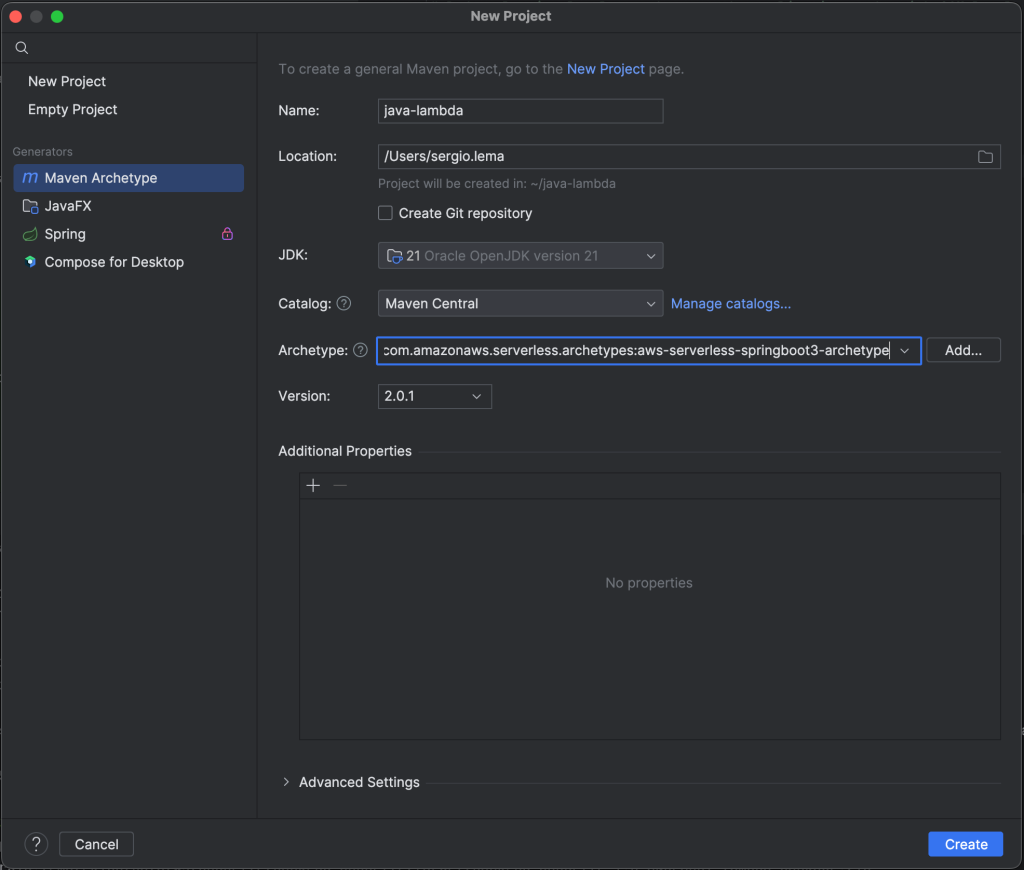
The created project has the Application class with the main method, and a StreamLambdaHandler class with the handleRequest method.
The main method is used to start the project in local. And the handleRequest method is used to connect the entry point of the Lambda to my Spring Boot application.
public class StreamLambdaHandler implements RequestStreamHandler {
    private static SpringBootLambdaContainerHandler<AwsProxyRequest, AwsProxyResponse> handler;
    static {
        try {
            handler = SpringBootLambdaContainerHandler.getAwsProxyHandler(Application.class);
        } catch (ContainerInitializationException e) {
            // if we fail here. We re-throw the exception to force another cold start
            e.printStackTrace();
            throw new RuntimeException("Could not initialize Spring Boot application", e);
        }
    }

    @Override
    public void handleRequest(InputStream inputStream, OutputStream outputStream, Context context)
            throws IOException {
        handler.proxyStream(inputStream, outputStream, context);
    }
}
Inside the StreamLambdaHandler, I also see the handler variable, which acts as a proxy to forward the requests from the Lambda to the adequate endpoints of my Spring Boot application.
AWS Lambda
To create the Lambda from the AWS console, I just need to choose the Java 21 runtime (or the one I want to use) and nothing more.
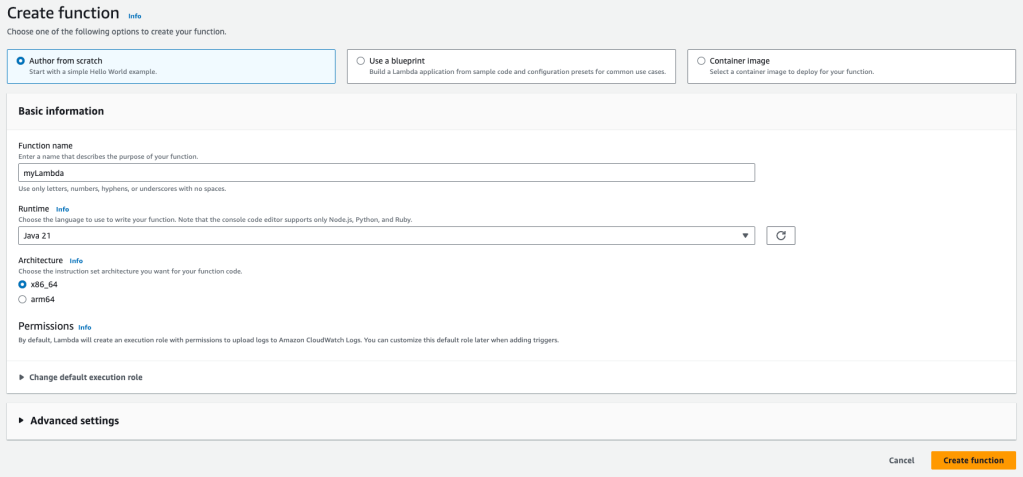
This will create an empty Lambda. From there, I can upload the JAR or ZIP file of my project.
I must also change the configuration of the Lambda to use the handleRequest method from my StreamLambdaHandler class.
Once uploaded and configured, I can test my Lambda from the console. To do so, I need to choose the API Gateway Proxy template. This creates a body with all the content necessary to my Lambda. There, I can choose which path to test with which HTTP method, that will be forwarded to my created endpoints.
Once everything is good, let’s continue creating the API Gateway.
API Gateway
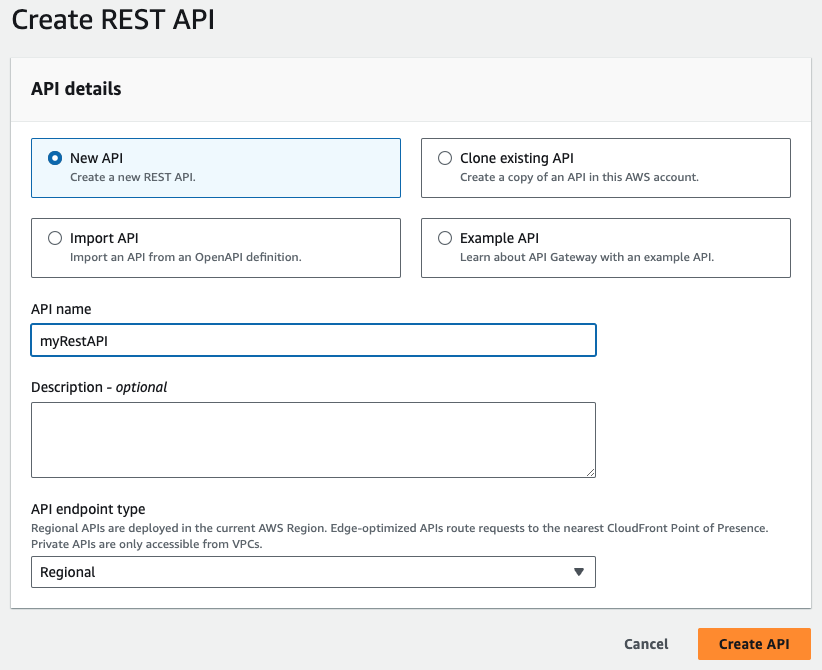
The API Gateway is another AWS Service which allows me to connect a single URL to many AWS Services. In my case, I will connect a single URL to many endpoints of a single Lambda.
First, I need to choose to create a REST API.
Once created, I need to create a Resource. The Resource is the next level of the URL. But as this is defined in my Spring Boot application, I want to configure the Resource to be dynamic. I want to tell the API Gateway: all the resources received must be forwarded to the Lambda.
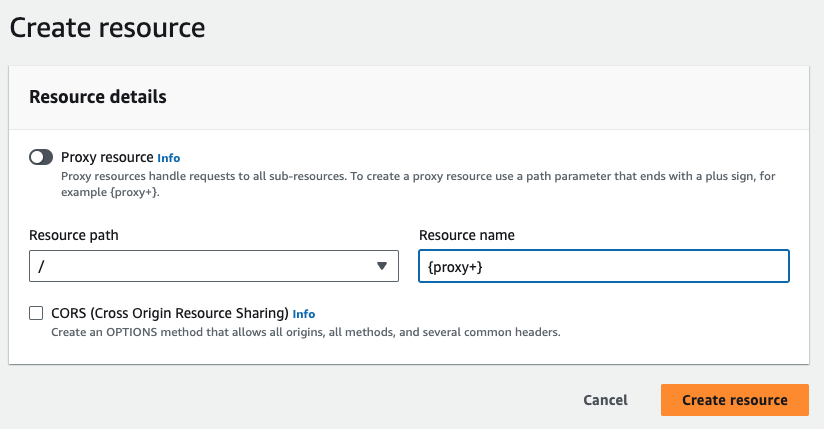
To do so, I indicate the keyword {proxy+}. This takes the incoming resources and forward them to the destination.
Let’s map now the Lambda as the destination. I create the HTTP Method.
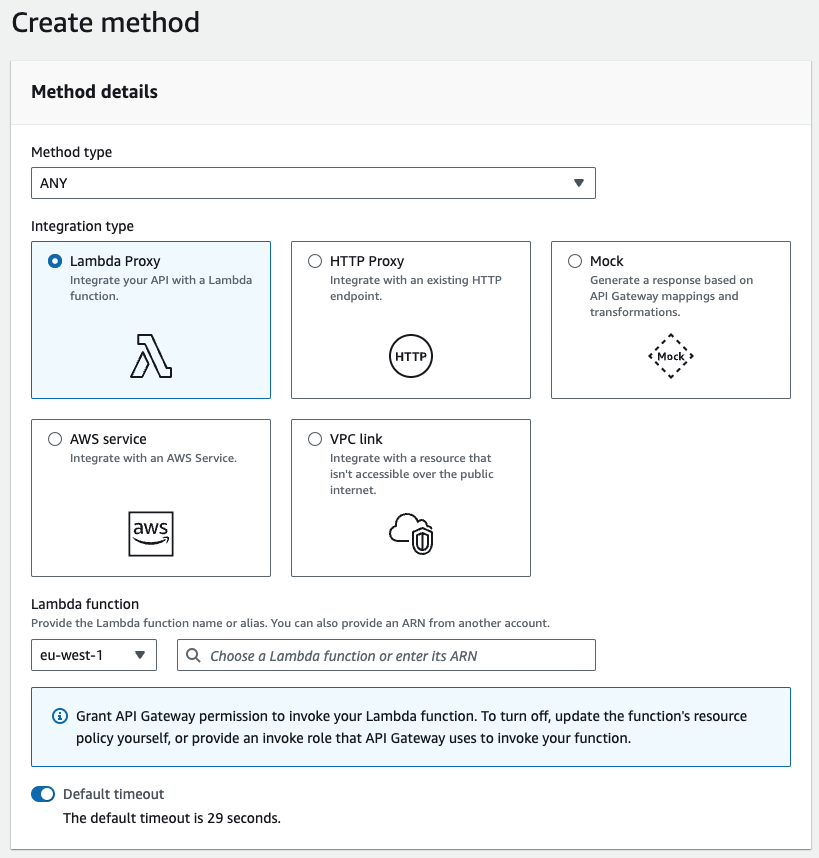
As before, I want that my API Gateway forwards all the incoming HTTP methods to my Lambda. I can do it choosing the verb ANY.
And below, I choose the previously created Lambda as destination of all the requests.
Once created the Resource and the Method, I can deploy my API Gateway. This creates the URL where I can request my Lambda.
Now I can test my Spring Boot application deployed in AWS Lambda using a single URL.
But there is one last point. The API Gateway can’t be used from a browser as there is no CORS configuration. Let’s solve this problem now.
CORS Configuration
To solve the CORS problem, I need to configure both my Spring Boot application and the API Gateway.
Starting with the API Gateway, I have a button Enable CORS when creating or editing the HTTP Method. There, I can choose all the origins allowed.
And the last point is to configure my Spring Boot application to accept requests from an external frontend.
@Configuration
public class CorsConfig {

    @Bean
    public WebMvcConfigurer webMvcConfigurer() {
        return new WebMvcConfigurer() {
            @Override
            public void addCorsMappings(CorsRegistry registry) {
                registry.addMapping("/**")
                        .allowedMethods(HttpMethod.GET.name(), HttpMethod.POST.name(), HttpMethod.DELETE.name())
                        .allowedOrigins("*")
                        .allowedHeaders(HttpHeaders.CONTENT_TYPE);
            }
        };
    }
}
I need now to build my project again and upload the ZIP file to test again from a browser.
Conclusion
I’ve chosen to use AWS Lambda for the costs. I’ve also chosen this architecture to test the response time of an application from AWS Lambda.
And the results are satisfactory.
The first request is a little bit slow, but once the Lambda is hot, the response times are similar than using an ECS Cluster.

Leave a comment