
Now that I have a React project ready, I need to deploy it somewhere.
Where can I deploy it? Do I need a server? What configuration is needed?
In this article I will go step by step to deploy a React frontend application to AWS S3. From creating the S3 Bucket to deploy the React project.
More details can be found in the official documentation of AWS on this link.
Build a React Frontend
When developing my React project, I have all my components separated in several JavaScript or TypeScript files. But when deploying, I need to compile and combine all of this into the minimum number of files possible. Those files must also include the external libraries.
Looking into the package.json file, I can see the build command as the following:
nx build
This will build all my frontend project and create the minimum number of files in the folder dist. Inside, I will see another folder with the name of the project, like dist/frontend.
Those are the files I will upload to AWS S3. But first, let’s create the AWS S3 Bucket where to upload them.
Create a AWS S3 Bucket
AWS S3 is a file system service of AWS that allow me to store any file of any size with high availability.
I will create an S3 Bucket to upload all my frontend project. Let’s go to the AWS console to create one with the default values as the following image.
Be aware that the S3 Bucket must be unique, unique all around the world. A convention rule is to use the ID of the AWS project as prefix. If the ID of the AWS project is 123-456-789, my S3 Bucket can be named as 123-456-789-my-bucket.
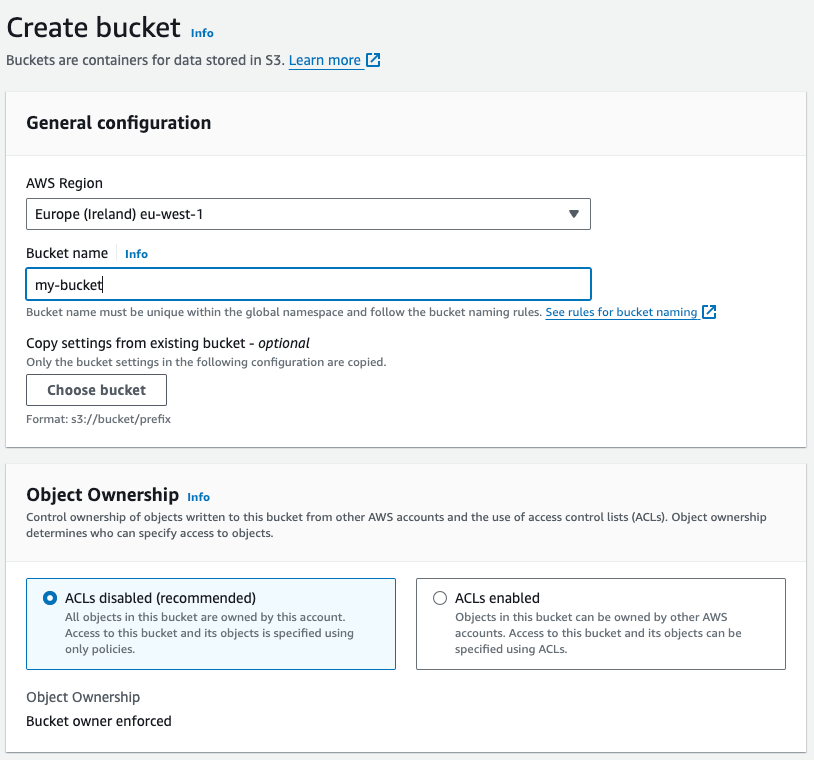
The resulting S3 Bucket allows me to store any file (text files or binary files). But those will be private. By default, all the files are private in the S3 Buckets.
But as I want my frontend to be publicly available on the Internet, I need to configure my S3 Bucket a little bit.
Create a Static Website with AWS S3
In the properties of my Bucket, I can found the Website hosting configuration as the following image. I must enable it.
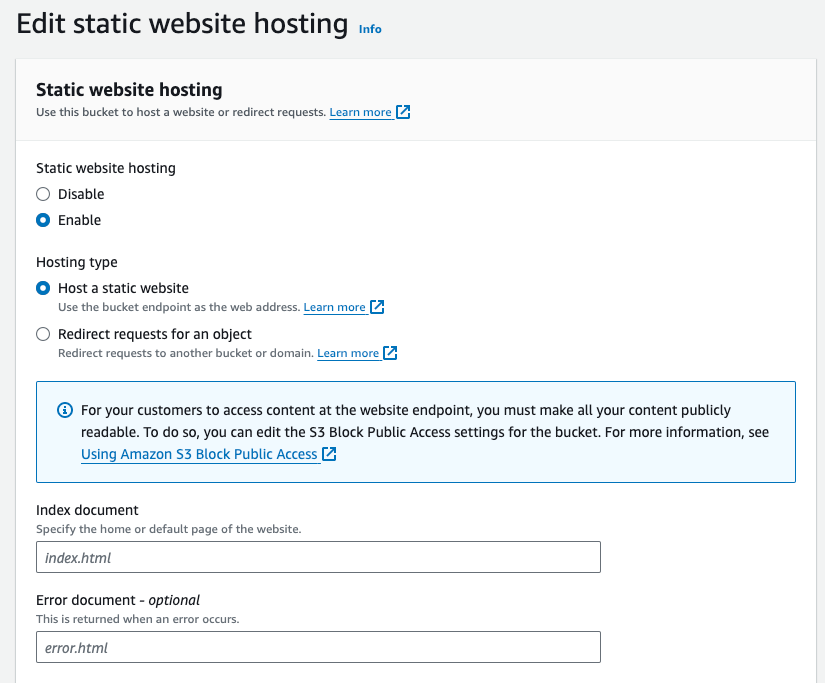
The most important point here is to indicate the path of the index.html. I can leave the rest of the options with their default values.
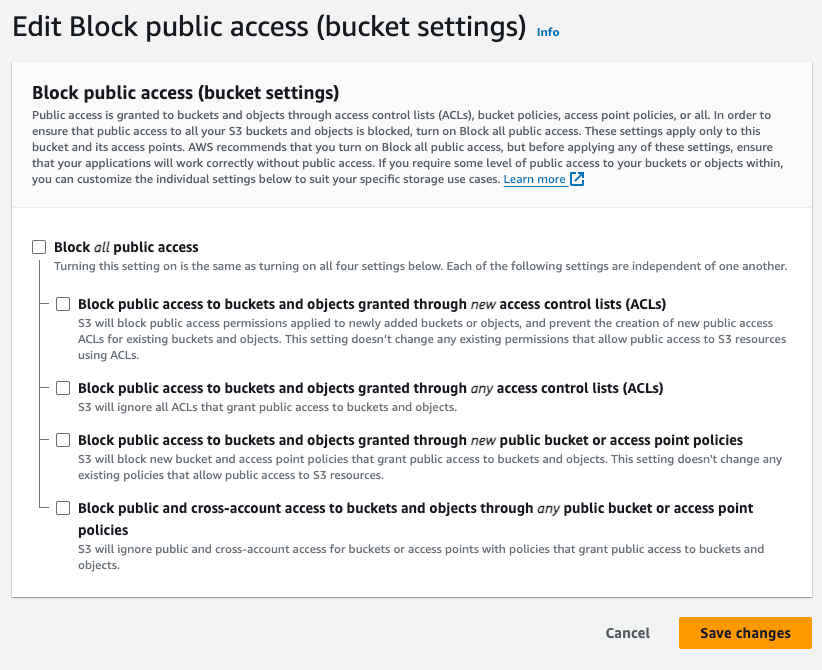
Now, I need to make the files of the S3 Bucket publicly available. This must be done in two steps.
First, I need to enable the public access. In the next image, you can find the configuration to change.
And the second step is to enable the policy access to the files. The following image shows a typical Bucket policy for a public Website.

Now, my S3 Bucket is ready to host a static Website made with React.
It’s time to upload my project and access it.
Upload the React files to AWS S3
Once configured the AWS CLI, I can run all the AWS commands from a terminal. Those commands can then be used from a CI/CD pipeline like GitlabCI or Github Actions.
aws s3 cp -r dist/frontend/ s3://my-bucket
The previous command uploads the content of my frontend project to my recently created S3 Bucket.
The last step is to verify my Website can be displayed from a browser.
Access my Website
By default, the static Websites in a S3 Bucket have a default URL which is the combination of the S3 Bucket name, the region where it’s hosted and some AWS keywords.
Here is the reason to have a unique S3 Bucket name, as the URL is automatically generated and must be unique all around the world.
http://<bucket-name>.s3-website.<region>.amazonaws.com
But this URL may not be the one I want for my Website. So, I can add a Domain Name with Route53. Route53 allows me to redirect a given Domain Name to the previous URL defined by AWS. This way, I can access my Website with my own Domain Name.
Another step is to have my Website accessible through HTTPS instead of HTTP. Within Route53, I can add an SSL Certificate to a Domain Name. This way, the URL will only be accessible through HTTPS.
Lastly, to speed up the response time of my Website, I can add a CDN (Content Delivery Network). This way, my Website will be spread all around the world in several servers. And when somebody access it with a browser, AWS will return the content from the closest server, not the one I’ve created.
I can add a CDN with AWS CloudFront. CloudFront takes the content of an S3 Bucket and copies it in several servers all around the world.
All of the steps to build and upload the code into an S3 Bucket can be used in a CI/CD pipeline. This way, every new modification will be applied directly to my Website. With no manual operation.

Leave a reply to Router and React Application in AWS S3 – The Dev World – Sergio Lema Cancel reply