
In this article, I’m gonna show how to quickly create a GCP Storage Bucket to deploy an Angular application.
I need to create a Storage Bucket to store my Angular project. Then, an Application Load Balancer to redirect the traffic from an URL or IP to the content of the Storage Bucket.
Let’s see the details.
Prepare your Frontend
First of all, I have to prepare the files to upload to the Storage Bucket.
Those files are not the files of the project, but I need to build my Angular project to obtain a compiled version of my project.
The compilation generates a set of 5 to 7 files which contain the complete project. It’s the sum of all the JavaScript, HTML and CSS content of the project compacted into single files.
To obtain those files, I can take a look at the package.json file or just run the following command:
ng build
The resulting files will be present in the dist folder. Inside, I will see another folder with the name of the project. And inside this folder are located all the generated files.
Configure your GCP Storage Bucket
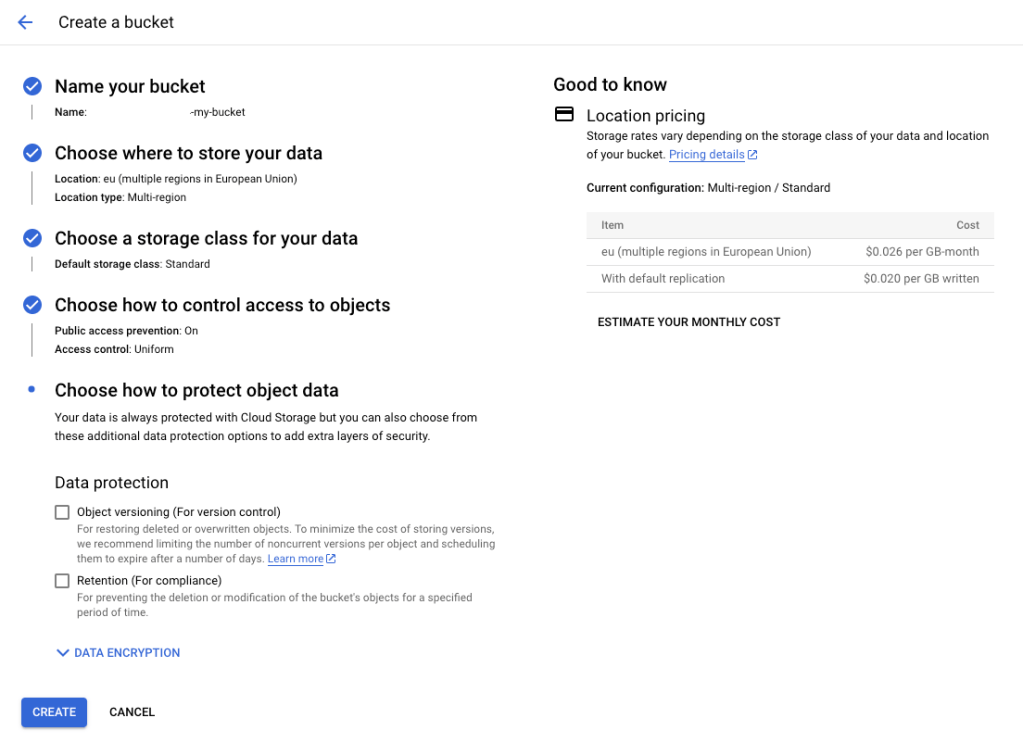
Now, I have to create and configure a Storage Bucket to upload the compiled files. I need to configure this bucket to be accessible through an URL, through a Load Balancer.
All the information can be found in this link.
Let’s first create my bucket where to store all the content. I choose the default options and a private bucket.
Once I have my bucket where to store the files of my Angular project, it’s time to create a Load Balancer which redirects the URL requests to the index.html file.
I go to the Network settings and create a Load Balancer, an Application Load Balancer.
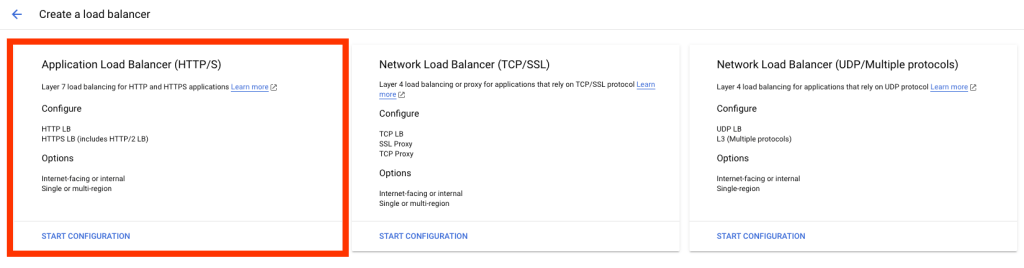
When configuring the Application Load Balancer, I need to setup a Frontend and a Backend.
For the Frontend, I leave the default values. The Frontend configuration defines how to access the Load Balancer, the port, the protocol and more.
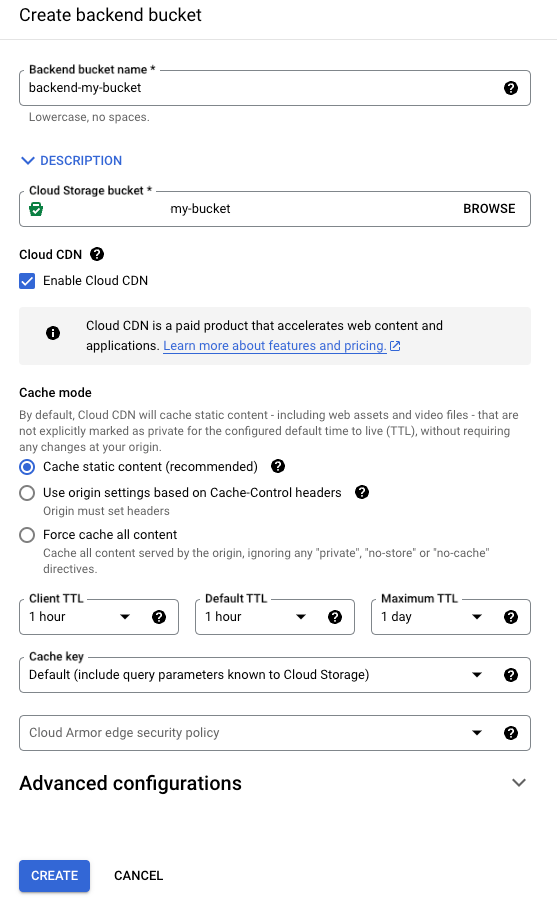
And for the Backend defines what is behind the Load Balancer. I want to have my Storage Bucket behind the Load Balancer. So, let’s configure the Backend Load Balancer as a bucket.
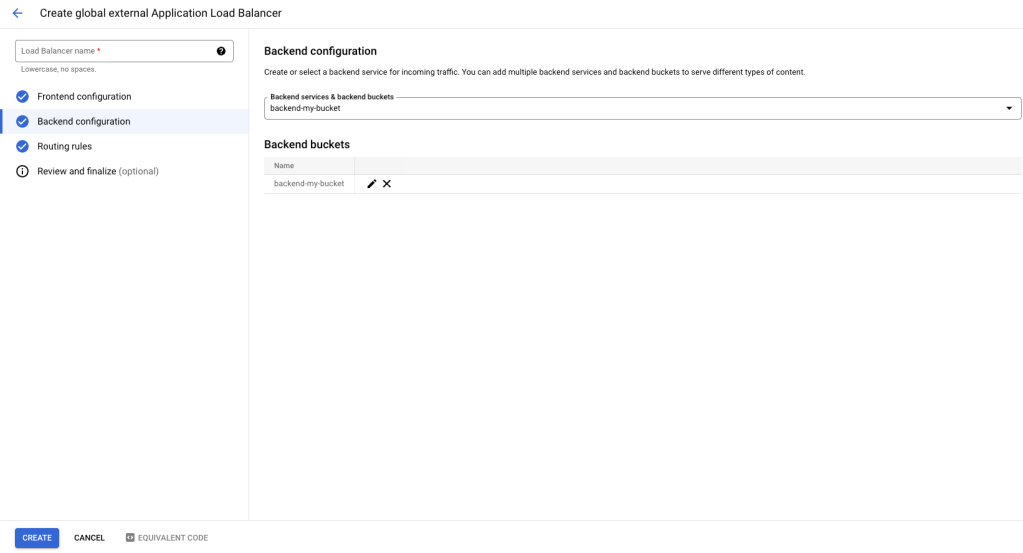
Finally, I have a summary window that displays the Frontend and Backend Configuration. After a click on the Create button, I have my Load Balancer created.
Once the Load Balancer created, I can go see the details to obtain the IP to request.
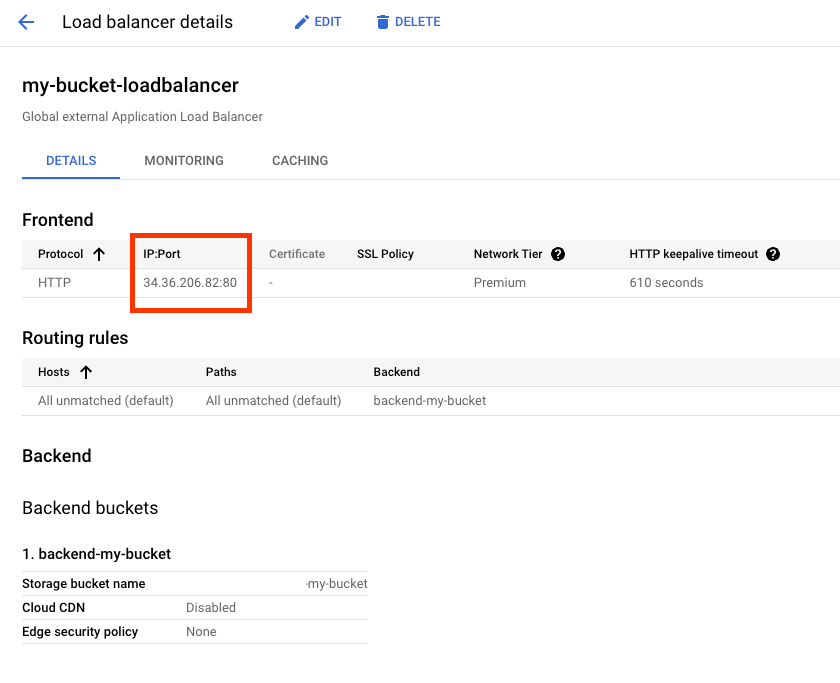
I copy the IP for later.
Upload the Content
All my architecture in GCP is created. It’s now time to upload the Angular project to my Storage Bucket.
To upload my project, I need to run the following GCP command on a terminal:
gcloud storage cp -r dist/frontend gs://my-bucket
This will upload the content of the dist/frontend folder (if my project is named frontend) to a Storage Bucket named my-bucket.
Access your Content
Now, from browser I can access the IP address of my Load Balancer. This will show the content of my Storage Bucket in the browser.
To go further, I can configure in my Load Balancer the SSL Certificate to navigate to my Angular project with the HTTPS protocol.
I can also configure a CDN (Content Delivery Network) to spread the frontend files across many regions in the world to be highly accessible and with fast access.
Finally, instead of an IP address, I can create a DNS record to attach a domain name to my Load Balancer. This way, I have a custom URL instead of an IP address.

Leave a comment